Homemade Peanut Butter Cups with Cashew Butter
Highlighted under: Homemade Baking Collection
I love making these Homemade Peanut Butter Cups with Cashew Butter because they strike the perfect balance of creamy and nutty flavors. Each bite is divine and takes me back to my childhood when I used to sneak candy from the pantry. This recipe is not only easy to follow, but it also allows for some customization—whether you like a tad more salt or want to add a sprinkle of sea salt on top. Trust me, once you try these, you'll find it hard to reach for store-bought versions again!
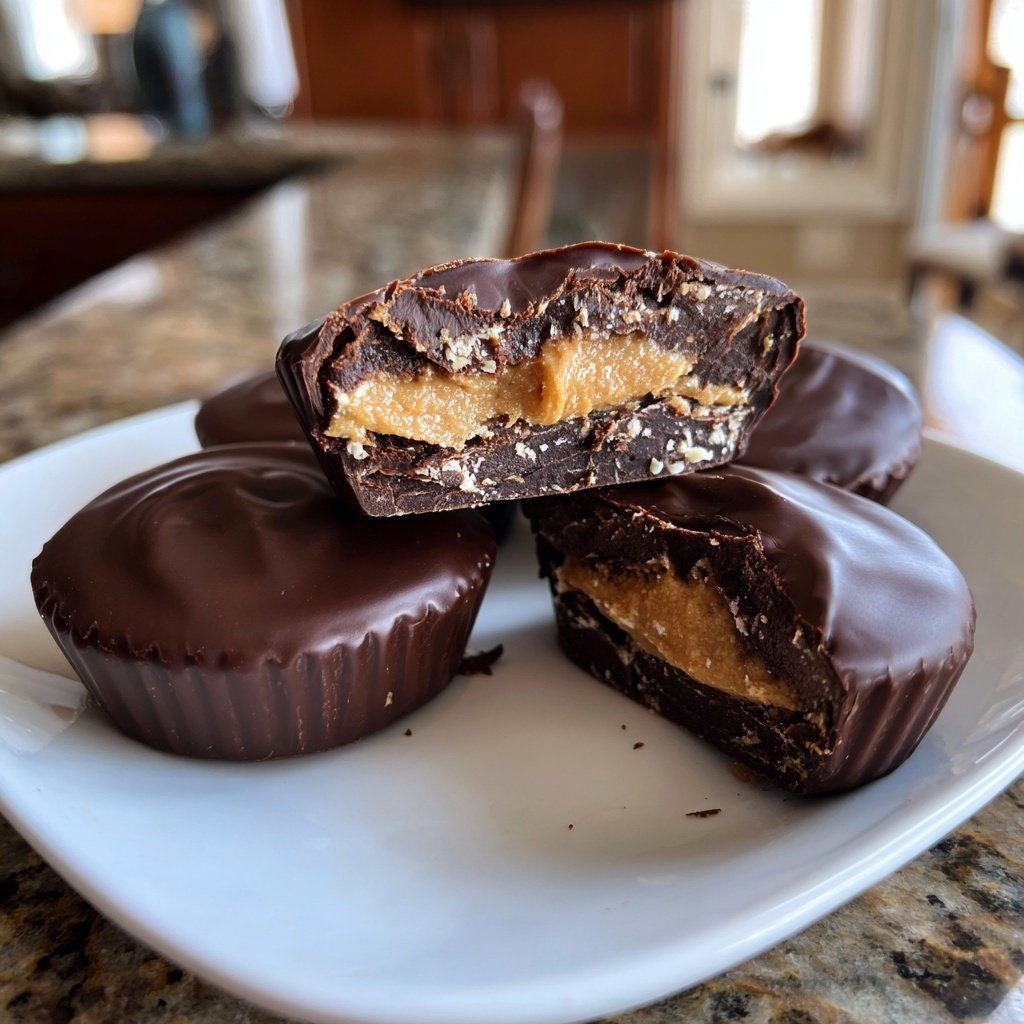
When I first decided to make these peanut butter cups, I wanted to create a healthier version without sacrificing the flavor. I experimented with cashew butter instead of traditional peanut butter and was pleasantly surprised by the result! The subtle sweetness of cashew butter pairs beautifully with the chocolate coating, making each cup a delightful treat.
Additionally, I discovered that using coconut oil in the chocolate adds a lovely sheen and rich flavor. The key to success with these cups is getting the chocolate ratio just right, ensuring the perfect balance between the nutty filling and the chocolate shell. My family can’t get enough of these!
Why You'll Love This Recipe
- Rich, nutty flavor from cashew butter
- Decadent chocolate coating that hardens perfectly
- Easy to make, perfect for sharing
Mastering the Chocolate Coating
Achieving a smooth chocolate coating is crucial for both appearance and flavor. When melting the dark chocolate chips with coconut oil, heat in controlled 30-second intervals in the microwave. Stir well after each interval to prevent the chocolate from scorching. It should become glossy and fluid, ideal for creating an even layer in your cups. If you find your chocolate is seizing or becoming too thick, adding a little more coconut oil can help restore that silky texture.
Pouring melted chocolate into the cupcake liners can be messy, so try using a small ladle or a squeeze bottle for more control. Aim to cover the base evenly, ensuring it is thick enough to hold the filling but not so thick that it overpowers the cashew butter. Once poured, gently shake the muffin tin side to side to settle the chocolate and eliminate air bubbles before chilling.
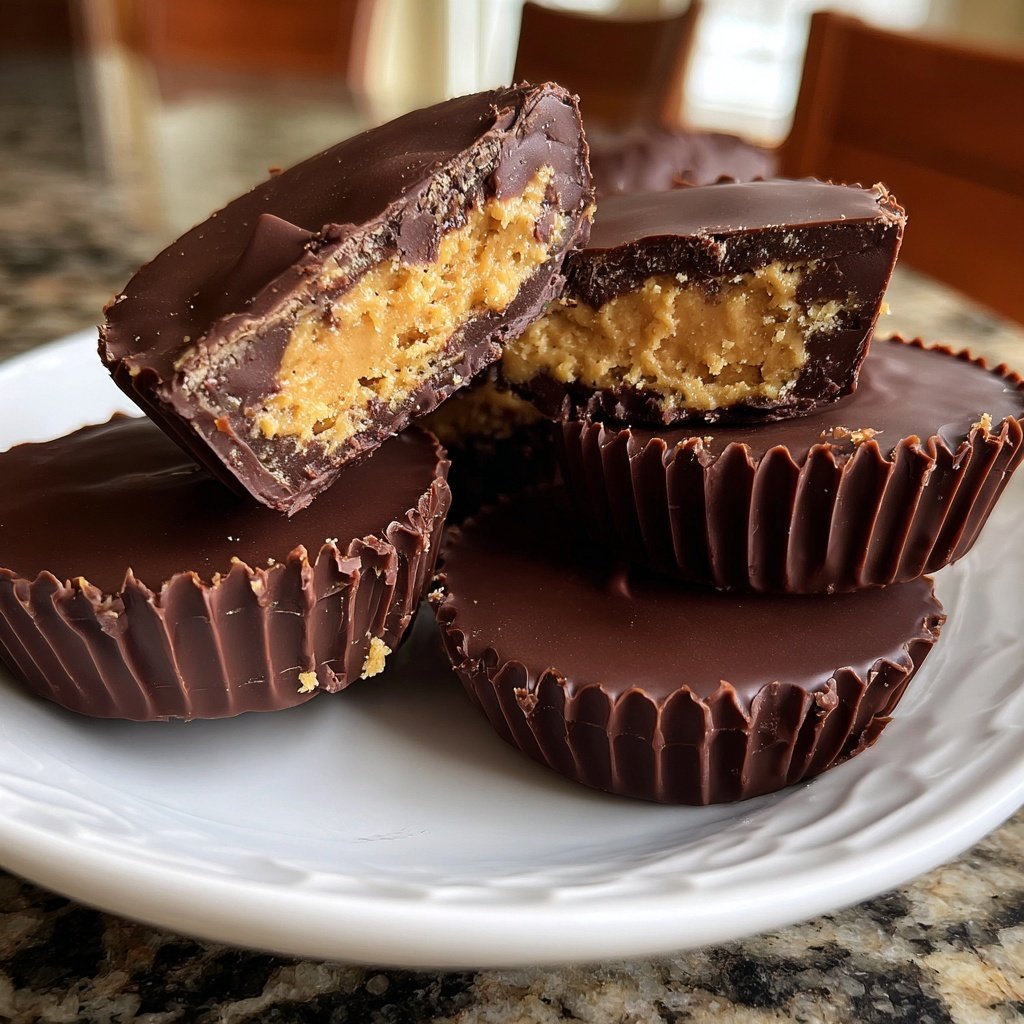
Perfecting the Cashew Butter Filling
The cashew butter filling is where you can personalize your peanut butter cups. I prefer using smooth cashew butter for a creamier consistency, but crunchy can offer delightful texture. Additionally, consider the sweetness: if you like a sweeter filling, increase the powdered sugar slightly, but be careful not to overpower the nutty flavor. A pinch of cinnamon or vanilla extract can elevate the taste even further, adding a warm undertone that complements the chocolate.
Mix the cashew butter, powdered sugar, and salt until fully blended, aiming for a spreadable yet firm consistency. If the mixture is too runny, try chilling it briefly in the refrigerator, which will help it firm up before you spoon it into the chocolate-lined cups. This ensures that when you pour over the additional layer of chocolate, it remains securely sealed within the cups.
Ingredients
Gather these simple ingredients to make your homemade treats:
For the Cups
- 1 cup cashew butter
- 1/4 cup powdered sugar
- 1/4 teaspoon salt
- 1 cup dark chocolate chips
- 2 tablespoons coconut oil
Make sure to measure everything out before you begin for a smoother preparation process!
Instructions
Follow these steps to create your delicious peanut butter cups:
Prepare the Chocolate Shell
In a microwave-safe bowl, combine the dark chocolate chips and coconut oil. Heat in 30-second intervals, stirring in between, until fully melted and smooth.
Mold the Chocolate
Using cupcake liners in a muffin tin, pour a layer of the melted chocolate into each liner, covering the bottom. Place the tray in the refrigerator for 10 minutes to set.
Make the Filling
In another bowl, mix the cashew butter, powdered sugar, and salt until well combined. Remove the muffin tin from the refrigerator.
Add the Filling
Spoon the cashew butter mixture into each chocolate-lined cup. Make sure it’s evenly distributed.
Top with More Chocolate
Pour additional melted chocolate over the cashew butter filling to cover completely. Smooth it out if needed.
Final Chill
Return the muffin tin to the refrigerator for another 15 minutes, allowing the chocolate to harden completely.
Once set, carefully remove the cups from the liners and enjoy your homemade treats!
Pro Tips
- For an extra touch, sprinkle a bit of sea salt on top of the chocolate before it sets. This elevates the flavor beautifully!
Storage Tips
After you’ve made your Homemade Peanut Butter Cups, proper storage is key to maintaining their freshness. Store them in an airtight container in the refrigerator for up to two weeks. If you prefer to keep them at room temperature, ensure they are in a cool, dry place to prevent the chocolate from becoming too soft. I often freeze them for longer storage; they can last up to three months in the freezer. To thaw, simply let them sit at room temperature for about 15-20 minutes before enjoying.
When frozen, these treats are still delicious and can provide a chilled, refreshing snack on a hot day. Just remember to seal them well to prevent freezer burn and preserve their flavor, as the chocolate can become brittle if stored improperly.
Serving Suggestions
These Homemade Peanut Butter Cups make great gifts or treats for gatherings. To dress them up, consider serving them in decorative cupcake liners or creating a dessert platter with fresh fruit, like strawberries or apple slices. A drizzle of melted chocolate on top or a sprinkle of finely crushed nuts can add visual appeal and an extra touch of flavor, making them even more indulgent.
For a quick dessert, pair your peanut butter cups with a scoop of vanilla ice cream or a dollop of whipped cream. The creaminess complements the rich chocolate and nuttiness beautifully, creating a balance that highlights the flavors of both components. Try experimenting with different toppings, such as a dusting of cocoa powder or a hint of sea salt, to enhance the taste experience further.
Questions About Recipes
→ Can I use almond butter instead of cashew butter?
Yes, almond butter works perfectly as a substitute and provides a different flavor profile.
→ How do I store the peanut butter cups?
Store them in an airtight container in the refrigerator. They will keep for up to 2 weeks.
→ Can I make these vegan?
Absolutely! Just choose vegan chocolate chips and you're all set.
→ What can I use instead of powdered sugar?
You can use maple syrup or honey, but this may alter the texture a bit. Adjust the cashew butter quantity to get the desired consistency.
Homemade Peanut Butter Cups with Cashew Butter
Created by: Rosamund Blake
Recipe Type: Homemade Baking Collection
Skill Level: Beginner
Final Quantity: 12 cups
What You'll Need
For the Cups
- 1 cup cashew butter
- 1/4 cup powdered sugar
- 1/4 teaspoon salt
- 1 cup dark chocolate chips
- 2 tablespoons coconut oil
How-To Steps
In a microwave-safe bowl, combine the dark chocolate chips and coconut oil. Heat in 30-second intervals, stirring in between, until fully melted and smooth.
Using cupcake liners in a muffin tin, pour a layer of the melted chocolate into each liner, covering the bottom. Place the tray in the refrigerator for 10 minutes to set.
In another bowl, mix the cashew butter, powdered sugar, and salt until well combined. Remove the muffin tin from the refrigerator.
Spoon the cashew butter mixture into each chocolate-lined cup. Make sure it’s evenly distributed.
Pour additional melted chocolate over the cashew butter filling to cover completely. Smooth it out if needed.
Return the muffin tin to the refrigerator for another 15 minutes, allowing the chocolate to harden completely.
Extra Tips
- For an extra touch, sprinkle a bit of sea salt on top of the chocolate before it sets. This elevates the flavor beautifully!
Nutritional Breakdown (Per Serving)
- Calories: 150 kcal
- Total Fat: 10g
- Saturated Fat: 6g
- Cholesterol: 0mg
- Sodium: 40mg
- Total Carbohydrates: 14g
- Dietary Fiber: 1g
- Sugars: 7g
- Protein: 4g